We’ve been doing some experimentation with containers and Docker/Docker Swarm for some of our on-premise applications at work. I’ve only just touched Kubernetes, the apparent winner of the container orchestration and management battle in the infotech arena. Now having some real experience under my belt with Docker/Docker Swarm (though I’ve got a ton still to learn), I wanted to get some real experience with Kubernetes.
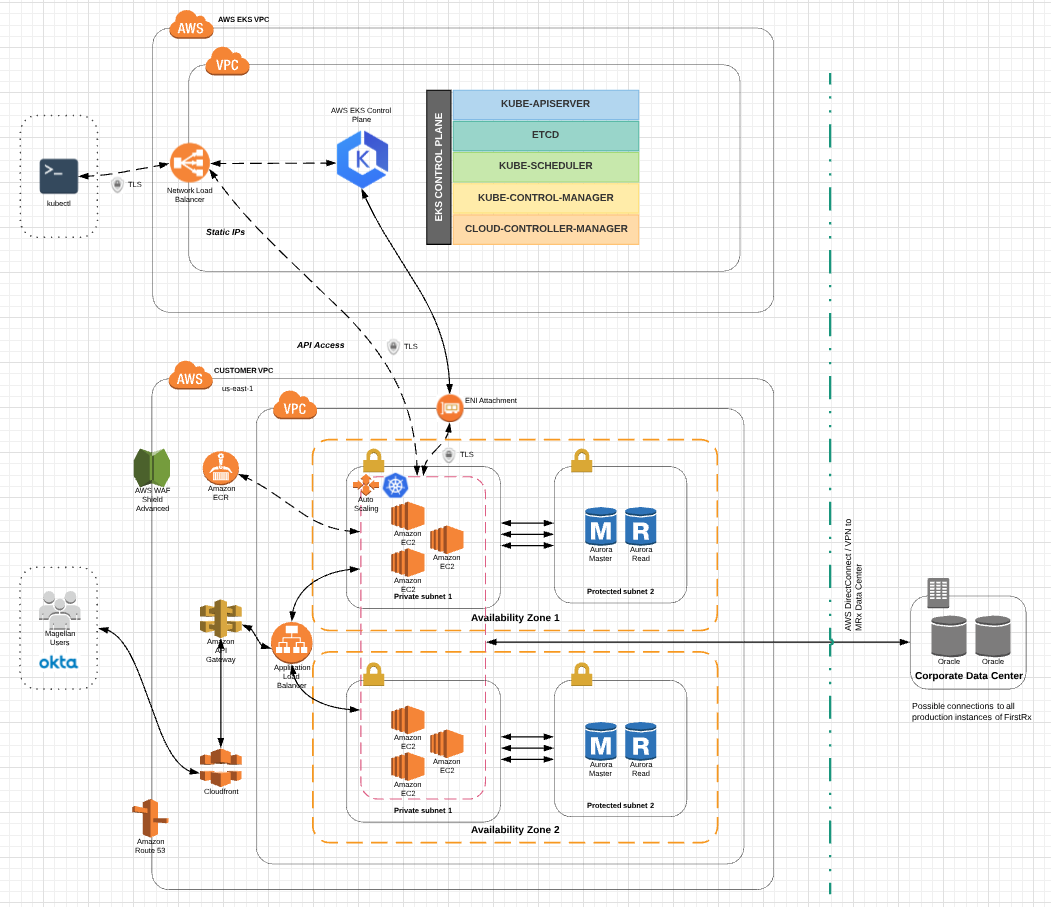
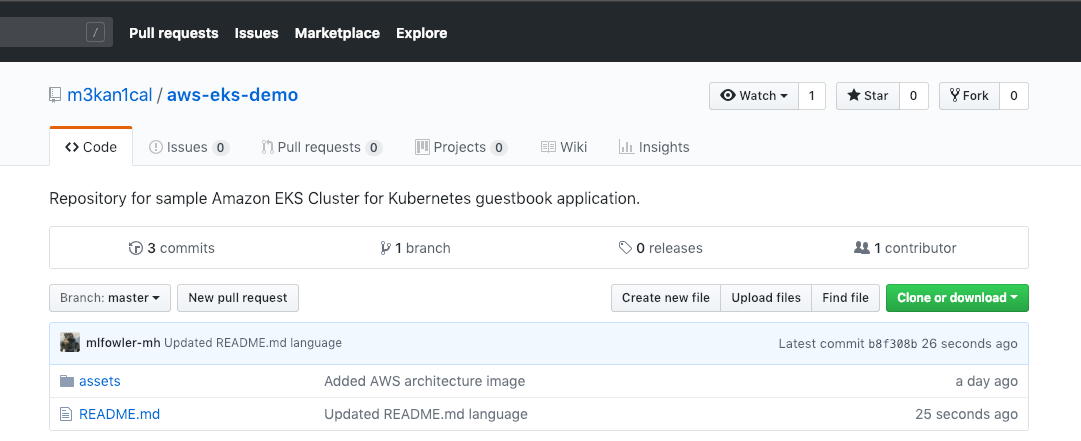
Over the past week and this weekend, I took the opportunity to dive deeper in to Kubernetes (k8s), specifically with Amazon EKS. This is the project I completed with the steps involved. The outputs of the steps are not exactly 1:1 to the architecture diagram I was basing this experiment on, but it does give a rough idea. If you’re interested in building your own Amazon EKS Cluster and Worker Nodes, you can do so following the steps here: https://github.com/m3kan1cal/aws-eks-demo
Create EKS Cluster Service Role in IAM
To create your Amazon EKS service role in the IAM console:
If you want to use values other than the defaults, check the CloudFormation template at the referenced URL for the parameters to work with. Note the following outputs generated from this command. These values will be used later in this demo.
aws cloudformation describe-stacks --profile=stoic \
    --stack-name "Stoic-EksCluster-Vpc-Stack" \
    --query "Stacks[].Outputs"[
    [
        {
            "OutputKey": "SecurityGroups",
            "OutputValue": "sg-069a1b7585d2ec879",
            "Description": "Security group for the cluster control plane communication with worker nodes"
        },
        {
            "OutputKey": "VpcId",
            "OutputValue": "vpc-0ee2845a85eef4d1b",
            "Description": "The VPC Id"
        },
        {
            "OutputKey": "SubnetIds",
            "OutputValue": "subnet-048f7eb94d7433cfa,subnet-0deacae0efb648275,subnet-015c0bdab265cf8fa",
            "Description": "All subnets in the VPC"
        }
    ]
]
Install kubectl for Amazon EKS
Kubernetes uses a command-line utility called kubectl for communicating with the cluster API server. Beginning with Kubernetes version 1.10, you can configure the kubectl client to work with Amazon EKS by installing the AWS IAM Authenticator for Kubernetes and modifying your kubectl configuration file to use it for authentication.
Amazon EKS clusters require the https://github.com/kubernetes-sigs/aws-iam-authenticator to allow IAM authentication for your Kubernetes cluster. Beginning with Kubernetes version 1.10, you can configure the kubectl client to work with Amazon EKS by installing the AWS IAM Authenticator for Kubernetes and modifying your kubectl configuration file to use it for authentication.
In the Kubernetes Engine, a cluster consists of at least one cluster master and multiple worker machines called nodes. A cluster is the foundation of KE: the Kubernetes objects that represent your containerized applications all run on top of a cluster. With this basic understanding on the table, and the above commands completed, now you can create your Amazon EKS cluster. There are some subtleties related to the IAM User or Role that creates the cluster and the ability to make API calls to the EKS API server. Make sure you know what IAM User or Role you are using when creating the cluster.
Note that the arn used in the following command for creating your EKS cluster is the one tied to the service role created at the beginning of this demo. The subnetIds and securityGroupIds are the values you noted above when the describe-stacks command was run against your EKS Cluster VPC CloudFormation stack.
If the above command is successful (if it fails, it’s most likely related to the IAM User or Role used to execute command), then you should see output similar to the above. Cluster provisioning usually takes less than 10 minutes. You can query the status of your cluster with the following command.
When your cluster status is ACTIVE, you can proceed. You can also omit the --query option to get a complete metadata listing of your EKS Cluster. A few other helpful commands to verify different aspects of your cluster are listed below:
First, make sure you have kubectl installed. Use these instructions for your OS platform:
Now it’s time to create your kubeconfig file for the EKS cluster you just built. Use the AWS CLI update-kubeconfig command to create or update your kubeconfig for your cluster. By default, the resulting configuration file is created at the default kubeconfig path (.kube/config) in your home directory or merged with an existing kubeconfig at that location. You can specify another path with the --kubeconfig option, which we’ll do in the following command.
Once you see a message about adding/updating a new context, then it’s almost time to test your configuration that was just created.
We’re going to make one modification before we move on. Most users are going to be using multiple AWS profiles when interacting with the CLI. To accommodate this scenario, open up the ~/.kube/config-Stoic-EksCluster file and add the following to the users section of the config file, right below the command: aws-iam-authenticator line. This will tell kubectl to use the AWS profile and credentials that the EKS Cluster was created with.
env:
- name: AWS_PROFILE
  value: stoic
We’re also going to make one more modification to our KUBECONFIG environment variable to accommodate multiple Kubernetes cluster configurations on your local machine. If you’ve worked with Kubernetes before, you may have an environment variable named KUBECONFIG. If so, save the current value of your KUBECONFIG environment variable, so you can restore it later. For example, on Linux:
export KUBECONFIG_SAVED=$KUBECONFIG
The KUBECONFIG environment variable is a list of paths to configuration files. The list is colon-delimited for Linux and Mac, and semicolon-delimited for Windows. If you do have a KUBECONFIG environment variable, familiarize yourself with the configuration files in the list.
If you have a $HOME/.kube/config-Stoic-EksCluster file like we created in this demo, and it’s not already listed in your KUBECONFIG environment variable, append it to your KUBECONFIG environment variable now. For example, on Linux:
If you find that you want to restore your configuration to the previous value, return your KUBECONFIG environment variable to its original value like this:
export KUBECONFIG=$KUBECONFIG_SAVED
Also, as you get going with kubectl you’re going to want to remember a few commands. Bookmark this URL for quick reference: https://kubernetes.io/docs/reference/kubectl/cheatsheet/. One small tip to prevent insanity is to run your commands with verbose logging enabled.
kubectl get svc --v=10NAME         TYPE        CLUSTER-IP   EXTERNAL-IP   PORT(S)   AGE
kubernetes   ClusterIP   10.100.0.1           443/TCP   5m
If everything checks out, you should end up with output like the above. To verify a bit more information on your EKS Cluster, use the following command:
Now that your VPC and Kubernetes control plane are created, you can launch and configure your worker nodes. Likely enough time has passed, but you need to wait for your cluster status to show as ACTIVE. If you launch your worker nodes before the cluster is active, the worker nodes will fail to register with the cluster and you will have to relaunch them.
Launch the CloudFormation Stack for the worker nodes with this command:
Note the following outputs generated from this command. These values will be used later in this demo.
aws cloudformation describe-stacks --profile=stoic \
    --stack-name "Stoic-EksCluster-WorkerNodes-Stack" \
    --query "Stacks[].Outputs"[
    [
        {
            "OutputKey": "NodeInstanceRole",
            "OutputValue": "arn:aws:iam::750444023825:role/Stoic-EksCluster-WorkerNodes-Stac-NodeInstanceRole-1LNSVW11HNA8Z",
            "Description": "The node instance role"
        },
        {
            "OutputKey": "NodeSecurityGroup",
            "OutputValue": "sg-00d7e7bd57570de90",
            "Description": "The security group for the node group"
        }
    ]
]
Enable Worker Nodes to Join EKS Cluster
We’ve got to do one thing to allow our new worker nodes to join the EKS Cluster we created. That means we need to download, edit, and apply the AWS authenticator configuration map.
2. Open the file with your favorite text editor. Replace the `rolearn` value with the `NodeInstanceRole` value that you recorded in the previous CloudFormation Stack creation procedure, and save the file.
When you see output like the above scrolling output, then you’re ready to move on to getting controllers and services deployed to your cluster.
Launching a Guest Book Application
Now that all our resources are created, we’re ready to actually do something with them. Even though we have a fully functioning and managed Amazon EKS Cluster and Worker Nodes, they’re not doing anything other than incurring costs in your AWS account. For this demo, we’re going to be using the sample Kubernetes guest book application right from the https://github.com/kubernetes/examples/blob/master/guestbook-go/README.md documentation.
After all is said and done, we’re going to have a Redis Master/Slave Replication Controller, a Redis Master/Slave Service, a Guestbook Replication Controller, and a Guestbook Service running on our EKS Cluster. Use the commands below to accomplish this.
1. Create the Redis master replication controller.
7. Now it’s time to query the services in your cluster and wait until the `External IP` column for the guestbook service is populated. It may take several minutes before the IP address is available.
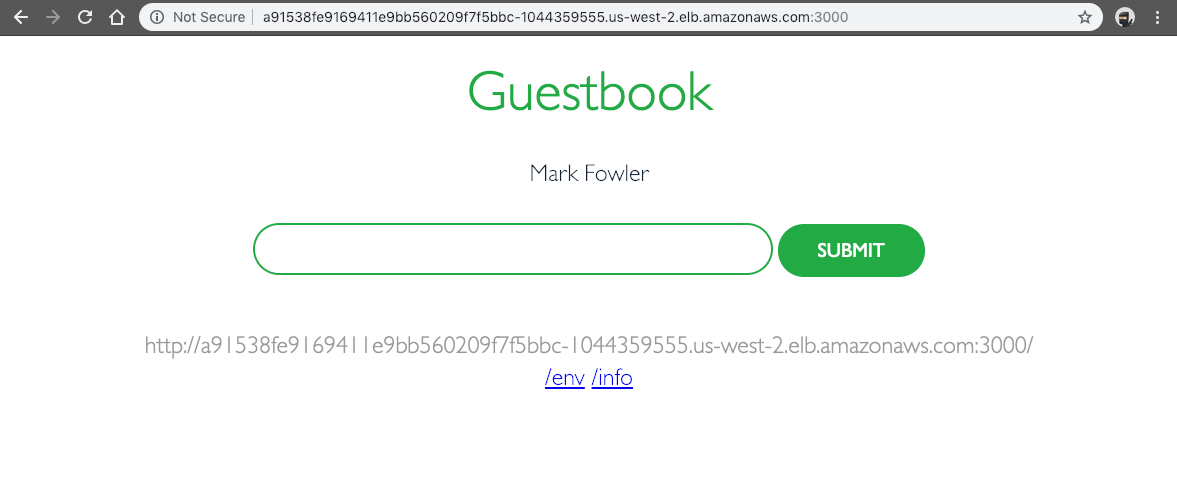
After your external IP address is available, point a web browser to that address at port `3000` to view your guest book. Note that it may take several minutes for DNS to propagate and for your guest book to show up. If everything is working properly, you should see something similar in your browser to the screenshot below.
Cleaning Up the Guestbook Demo Application
When you are finished experimenting with your guest book application, you should clean up the resources that you created for it. The following command deletes all of the services and replication controllers for the guest book application:
When you are done with your Amazon EKS cluster, you should delete it and its resources so that you do not incur additional charges. Be warned that the EKS Cluster and Worker Nodes will rack up some costs pretty quickly if left unchecked.
When you are done with your Amazon EKS cluster, you should delete it and its resources so that you do not incur additional charges. Be warned that the EKS Cluster and Worker Nodes will rack up some costs pretty quickly if left unchecked. Use these commands to clean up your stacks and EKS cluster.
Kubernetes has a certain “hardened through battle” feel to it. It just feels rock solid as you’re playing with it, watching it scale worker nodes in and out, working with the REST API to control your cluster.
k8s also is very complex. Much more so than Docker/Docker Swarm to me. Without significant experience, I don’t think I’d want to set up a k8s cluster on-prem. Docker Swarm seems much more simple to build and maintain for an on-premise team.
Amazon EKS has made the process of spinning up an EKS Cluster and Work Nodes as easy I can picture it being. It’s not surprising to me that its carving out a big chunk of the k8s space.
Having played with k8s at a high-level this week, I see some very solid use cases within work. My brain is focused on a “best of breed” Rx claims adjudication system for the near future, and I see some very strong opportunities for Amazon EKS for more automation, more lightweight virtualization, more resiliency, microservices and decoupling systems, and more horizontal scaling.
Also, if we do decide to bring Amazon EKS in-house or another flavor of k8s, we’ll need to be careful. We can do it but we’ll need a very solid plan or we’ll end up more brittle than we are now.
Recently, I have written some articles about what Java developers should learn this year, e.g.programming languages,libraries, andframeworks, but if you have just one thing to improve or learn, then that must be yourautomation testing skills.
Testing is one of the disciplines that separates professional developers from amateur ones. It's not about following TDD, BDD, or whatever testing methodologies, but at the very minimum level, you must write code to test your code automatically.
Many Java developers write unit tests and integration tests that automatically run during build time, mostly by using continuous integration tools like Jenkins or TeamCity.
If some of you are wondering why a programmer should focus on automation testing, then let me tell you that the importance of automation testing is growing exponentially due to more awareness and emergence of DevOps.
Companies generally prefer programmers who are good at writing unit tests and show good knowledge of various unit testing frameworks, libraries, and tools e.g. JUnit, Selenium, REST-Assured, Spock framework, etc.
As a Java developer, we work on very different areas, starts from writing core Java code to creating JSP pages, writing REST APIs, and sometimes even creating Groovy scripts for build automation. That's why we also need to be aware of different tools we can use to automate testing.
For example, I only knew JUnit for a long time, but when I had to test my JSP pages, I was clueless until I found Selenium. Same goes with REST Assured because I usually test my REST API using curl commands, but REST Assured takes the unit testing of REST APIs to another level.
10 Useful Unit and Integration Testing tools for Java Programmers
Since I believe a programmer is as good as their tools, I always try to learn and explore new tools and libraries in my free time, and this list is part of that research.
In this article, I am going to share 10 of the best and essential tools, frameworks, and libraries that can help Java developers writing unit tests and integration tests on their various Java projects.
JUnit
I don't think JUnit needs any introduction. Even if you are a beginner Java programmer, you might have heard about it. It allows you to write unit tests for your Java code.
Almost all major IDEs, e.g. Eclipse, NetBeans, and IntelliJ, provide JUnit integrations, which means you can both write and run the unit test right from those IDEs.
Most of us are still using JUnit 4, but JUnit 5 is already released and probably the next thing to look at this year. You can use JUnit for both unit and integration testing and it also supports Java 8 features.
REST Assured
Testing and validating REST services in Java is harder than in dynamic languages such as Groovy.
REST Assured brings the simplicity of using these languages into the Java domain. It's a great tool for REST API integration tests.
Selenium
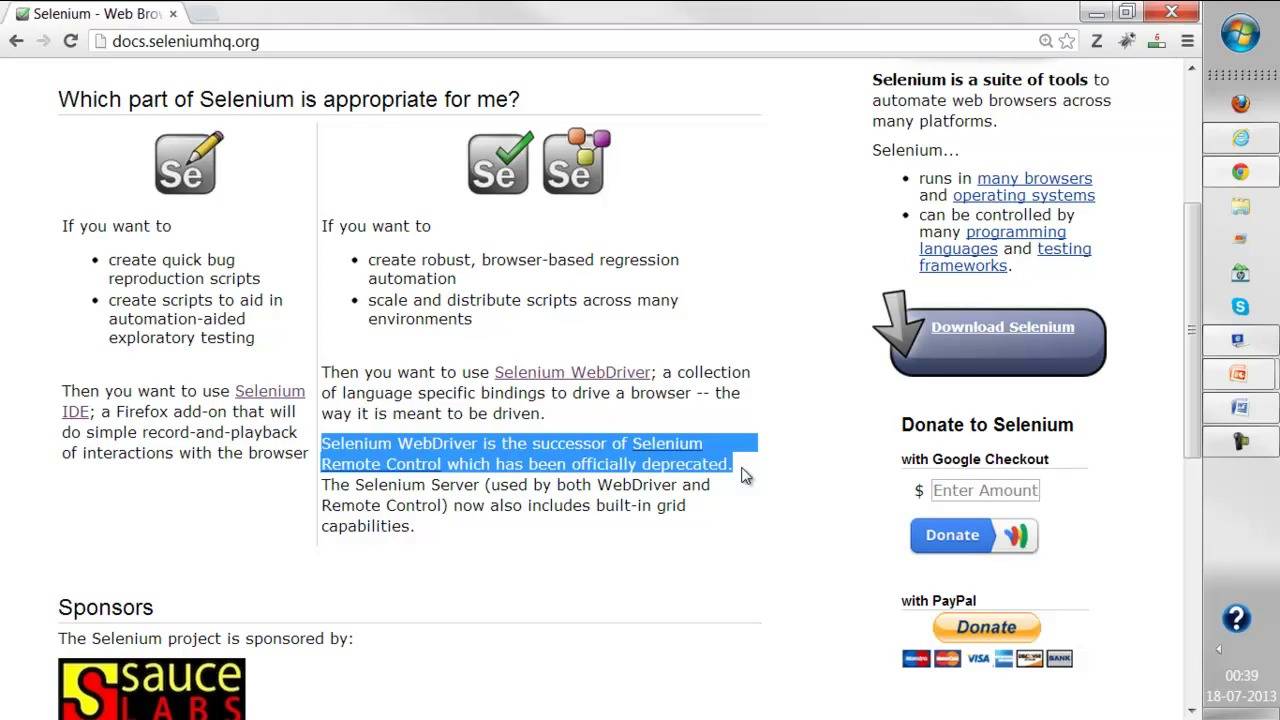
Selenium is probably the most popular tool for Java UI testing, which allows you to test your JSP pages without launching them in a browser.
You can test your web application UI using JUnit and Selenium. It even allows you to write web application acceptance tests.
TestNG
TestNG is a testing framework inspired by JUnit and NUnit but introducing many new functionalities that make it more powerful and easier to use, such as annotations, running your tests in arbitrarily big thread pools with various policies available (all methods in their own thread, one thread per test class, etc).
The gap between JUnit and TestNG has reduced because of using annotations from JUnit 4 and integrating the Hamcrest matchers as well but it's up to you.
Mockito
There are many mocking frameworks for Java classes, e.g. PowerMock and JMock, but I personally like Mockito for their simple API, great documentation, and lots of examples.
Mocking is one of the essential techniques of modern-day unit testing, as it allows you to test your code in isolation without any dependency, and that's why I encourage every Java developer to learn a mocking framework along with JUnit.
My favorite mocking framework is Mockito, but if you like, you can also explore PowerMock or JMock.
Spock Framework
Spock is another testing and specification framework for Java and Groovy applications. It's written in Groovy, which makes it a very expressive and to-the-point specification language.
When you use Spock, your test will become more readable and easier to maintain and thanks to its JUnit runner, Spock is compatible with most IDEs, build tools, and continuous integration servers.
Unfortunately, I didn't find a useful course to learn Spock framework but Java Testing with Spock book is a good resource to start with.
Cucumber
Cucumber is another great tool for automated integration tests, but what makes it different from other tools in the same category is its specification capability.
Cucumber merges specification and test documentation into one cohesive whole living documentation and since they will be automatically tested by Cucumber, your specifications are always banged up-to-date.
Spring Test
Spring MVC comes with a very useful test framework that allows doing in-depth testing without even involving a web container.
It is one of the most useful libraries for writing automated tests to Spring applications. It provides a first-class support for writing unit and integration tests to Spring-powered applications, including MVC controllers.
There is also a Spring Test DbUnit that integrates the Spring Test framework with DbUnit and a Spring Test MVC HtmlUnit, which integrates the Spring Test MVC framework with HtmlUnit.
By using these tools you can easily test your Spring MVC application in an automated way.
DBUnit
A database is an integral part of many Java applications, both core Java and web applications, and probably the biggest obstacle while doing unit testing.
It's not reliable to connect to Dev or UAT databases for integration tests because anyone can change the data and schema, e.g. tables and stored procedures, and that will cause your automated integration tests to fail.
DbUnit is a JUnit extension that can be used to initialize the database into a known state before each integration test to ensure that the database contains the correct data.
DbUnit has its own issues, but it is a very useful tool because it helps us to separate the test data creation from the tested code.
Robot Framework
The Robot Framework is a Python-based generic test automation framework for acceptance testing and acceptance test-driven development.
It is a keyword-driven testing framework that uses tabular test data syntax. You can use it to test distributed, heterogeneous applications, where verification requires touching several technologies and interfaces.
If you decide to learn this wonderful framework for integration test, then Udemy's Robot Framework Test Automation is a great resource to start with.
It's a two-part course which covers the basic and advanced features of Robot framework.
Conclusion
That's all about some of the essential unit testing and integration testing tools, frameworks, and libraries for Java developers.
There are many more libraries that I have not included in this list, e.g. AssertJ and Hamcrest, which can help you to write beautiful and fluent tests — but take things slowly.
To start with, learn a tool or library that you can use in your day-to-day work. For example, if you are working with Java UIs, then you should first learn Selenium because then you can focus on this tool more.
Similarly, if you are working on REST APIs then learn REST Assured (See REST with Spring). If you are doing a lot of core Java work, then JUnit 5 is probably the first library you should look at.
First of all, it's not really an either or scenario with OAuth and JSON Tokens as they are compatible - wherein JWT is a token format used by the authentication framework, OAuth.
JWT is a compact and self-contained mechanism, digitally authenticated and trusted, for transmitting data between various parties. They are extremely easy to use and are mainly used for implementing stateless authentication mechanisms.
OAuth 2 offers authorization flows for Java application development, along with mobile devices. It works with a central authorization server, which is used by the client to obtain access to a protected resource placed on the server. The access is only possible using a valid access token issued in the form of JSON – but it has no definitive structure assigned to it. OAuth 2.0 defines a protocol for passing your access token within the Authorization header. The resource server validates the signature using the following information:
Client
Lifetime
Scopes
Roles
Similarities
Token Presentation to the server: JWT authentication and OAuth2 appear very similar in presenting the token to the Resource Server. However, the former does not specify the methods used to obtain the token. This is where OAuth fills the void by defining various ways in which the Client can obtain an access token from the Authorization Server.
Used across services: Both JWT and OAuth2 give you one authorization server to handle all Logins/Registrations and generates the token – making it easy for corporate systems to have a secure environment. It removes all connections between auth-server and other servers, other than the pre-defined public key.
Differences
JSON is less verbose, which makes it compact in size. It becomes a better choice to be used in HTML and HTTP environments. The use of JWT at Internet scale increases the ease of client-side processing of tokens on various platforms simultaneously.
Why Should We Use OAuth2?
OAuth2 aims to simplify authorization to access protected data. It allows you access your data but protects the owner’s account credentials in the process. It allows the user to access data from one web account to the other by simply giving out tokens, instead of credentials. The token grants access to certain specific resources for a specific duration, which can be shared with a third party. This temporary data transfer authorization is done without providing anyone with complete access to all the data. Users can share verifiable assertions about themselves using OAuth2, without releasing personally identifiable information.
Cons of OAuth2:
OAuth2 protocol requires a secret string obtained from the service to be delegated. Developers find it difficult to manage this string on mobile devices, as it can be easily found in the application and misused.
Cons of JWT:
Compromised Secret Key: The one key method makes it slightly less reliable. If the Key is leaked, it compromises the whole system.
No Push Messages: Due to the lack of session records in the DB, identifying a client per user is not possible – hence, we cannot push messages.
Conclusion:
Using OAuth2 setup for authenticating multiple API platforms and applications, both in both public and private settings is a much more sensible way of doing things. JSON web tokens can work as your bearer tokens here and make life easier.